You have 2 choices on how to price your prints. You can set up global pricing or add custom prices.
You'll want to add the markup (profit) that you want to earn on each print size.
The actual print prices are determined by the printer, Sensaria (formerly Graphik Dimensions).
- From FASO Control Panel
- Click Prints icon (upper row)
On this page you can see all of the POD information which includes all the steps for getting started.
If you want to set global prices, click Global POD Default Pricing.
Enable prints for each artwork.
Go back to Home Screen of Control Panel
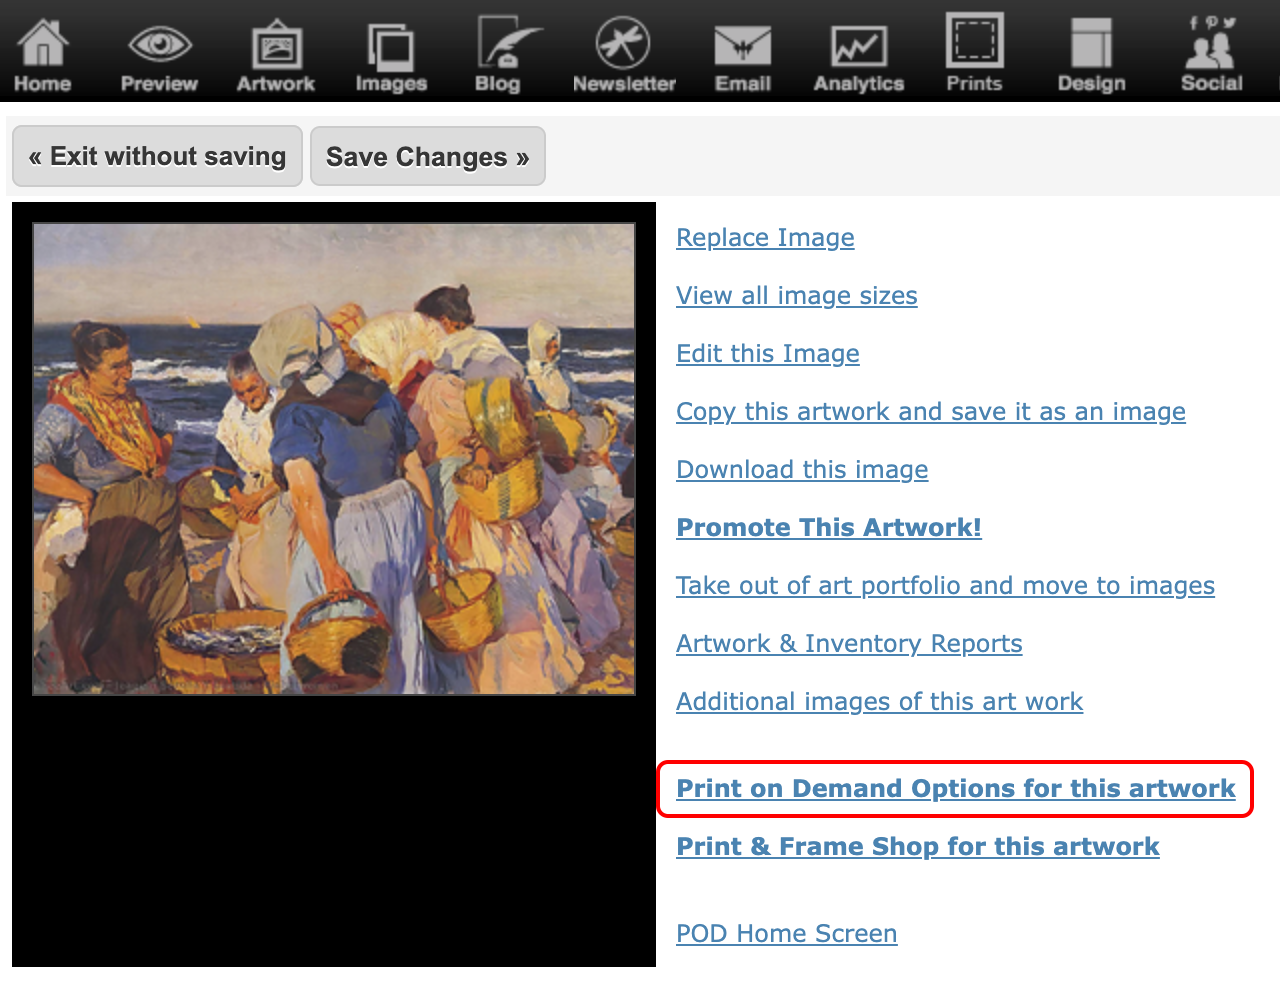
- Click Artwork icon (upper row)
- Click Edit for an artwork (or click on thumbnail image) to edit image
- Click Print on Demand Options for this Artwork
- Then
- Set up Global Print Sizes
or - Set up Custom Print Sizes
- Set up Global Print Sizes
You can offer up to 6 print sizes.
The sizes shown do not mean that the prints are only offered in a square format. It just means that one side will be close to one of those measurements.
For example, the markup for a 6 x 6 will also apply to a 6 x 8 print.
Set up Global Print Sizes
Global default prices are meant to allow artists to start selling prints as quickly as possible without having to price every single artwork.
Ultimately it is best to set up the sizes and customize the prices on a per artwork basis.
(See Set up Custom Print Sizes below for How To.)
- Make sure you checked Global POD Default Pricing box in the POD information screen (see above).
- Check Enable print sales for this artwork
- Click Save Print Settings
The default pricing works by position in the ordering, not by size. The size on the defaults page is just a placeholder. The ordering on the default pricing starts at top left, then proceeds left-to-right, then top-to-bottom.
This is because the available sizes in which a given artwork can be printed to will vary depending on the artist's body of work, so this allows artists to generically specify prices and start selling prints right out of the box. In other words, the default prices can be seen as setting up the prices of the calculated print options of a given artwork, from the first through the sixth option.
Set up Custom Print Sizes
- Click Artwork icon (upper row)
- Click Edit for an artwork (or click on thumbnail image) to edit image
- Click Print on Demand Options for this Artwork
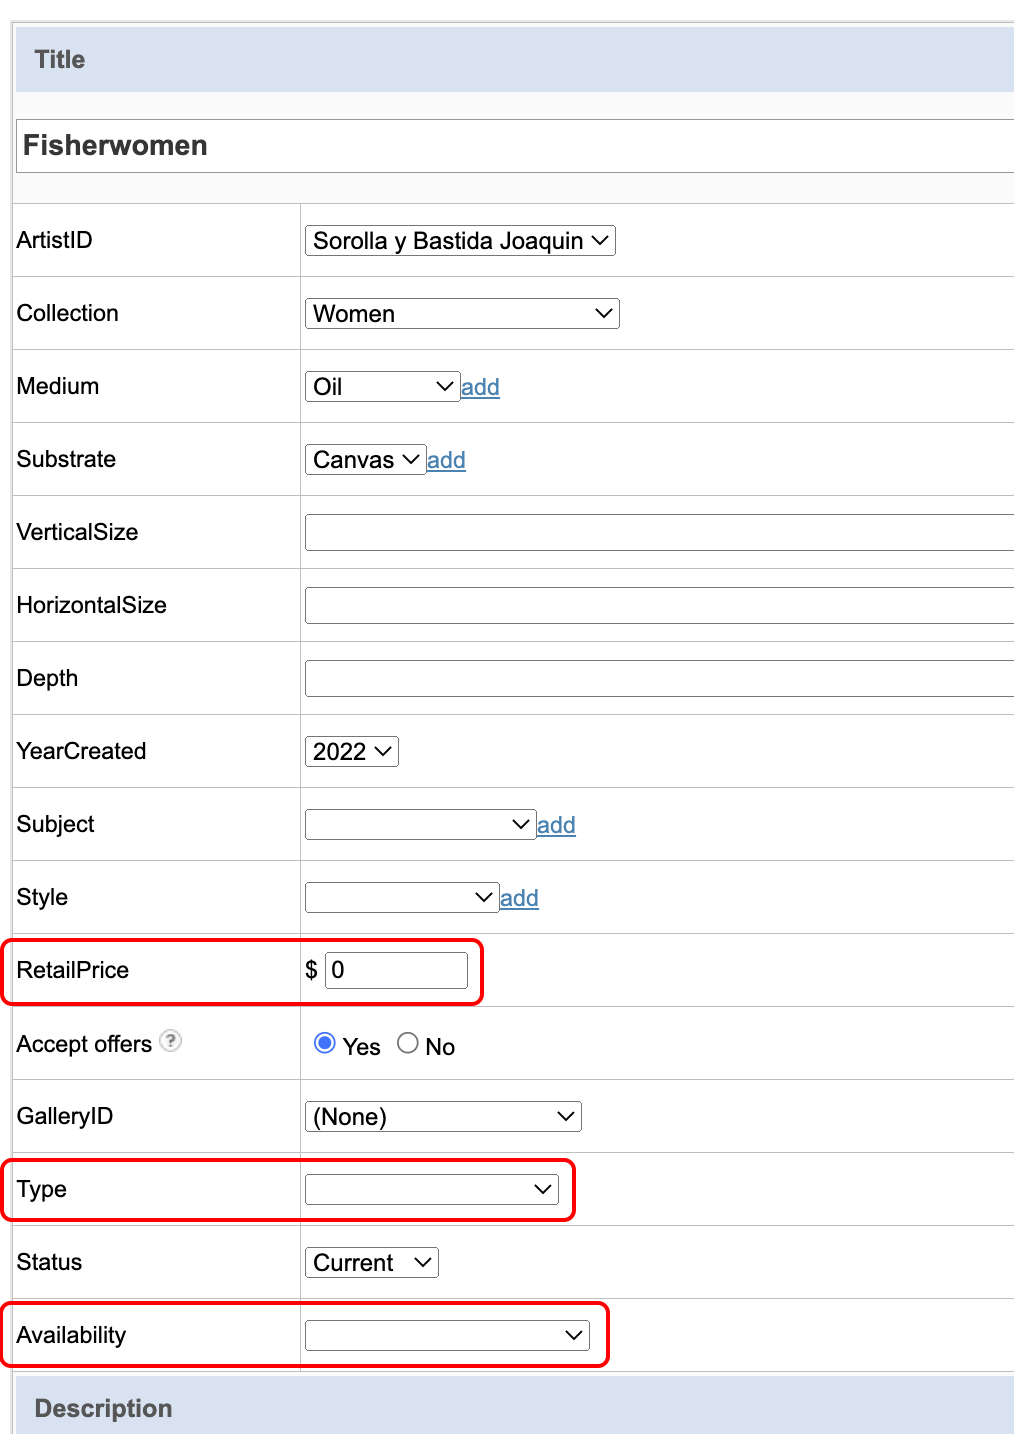
- Select the sizes you want to offer
Open the drop down menu for each size to select a custom size - Add the markup to each size
- Check the enable box for each size you want to sell (just below the size field)
- Click Enable print sales for this artwork
- Click Save Print Settings
Do these steps for each artwork that you want to sell as prints
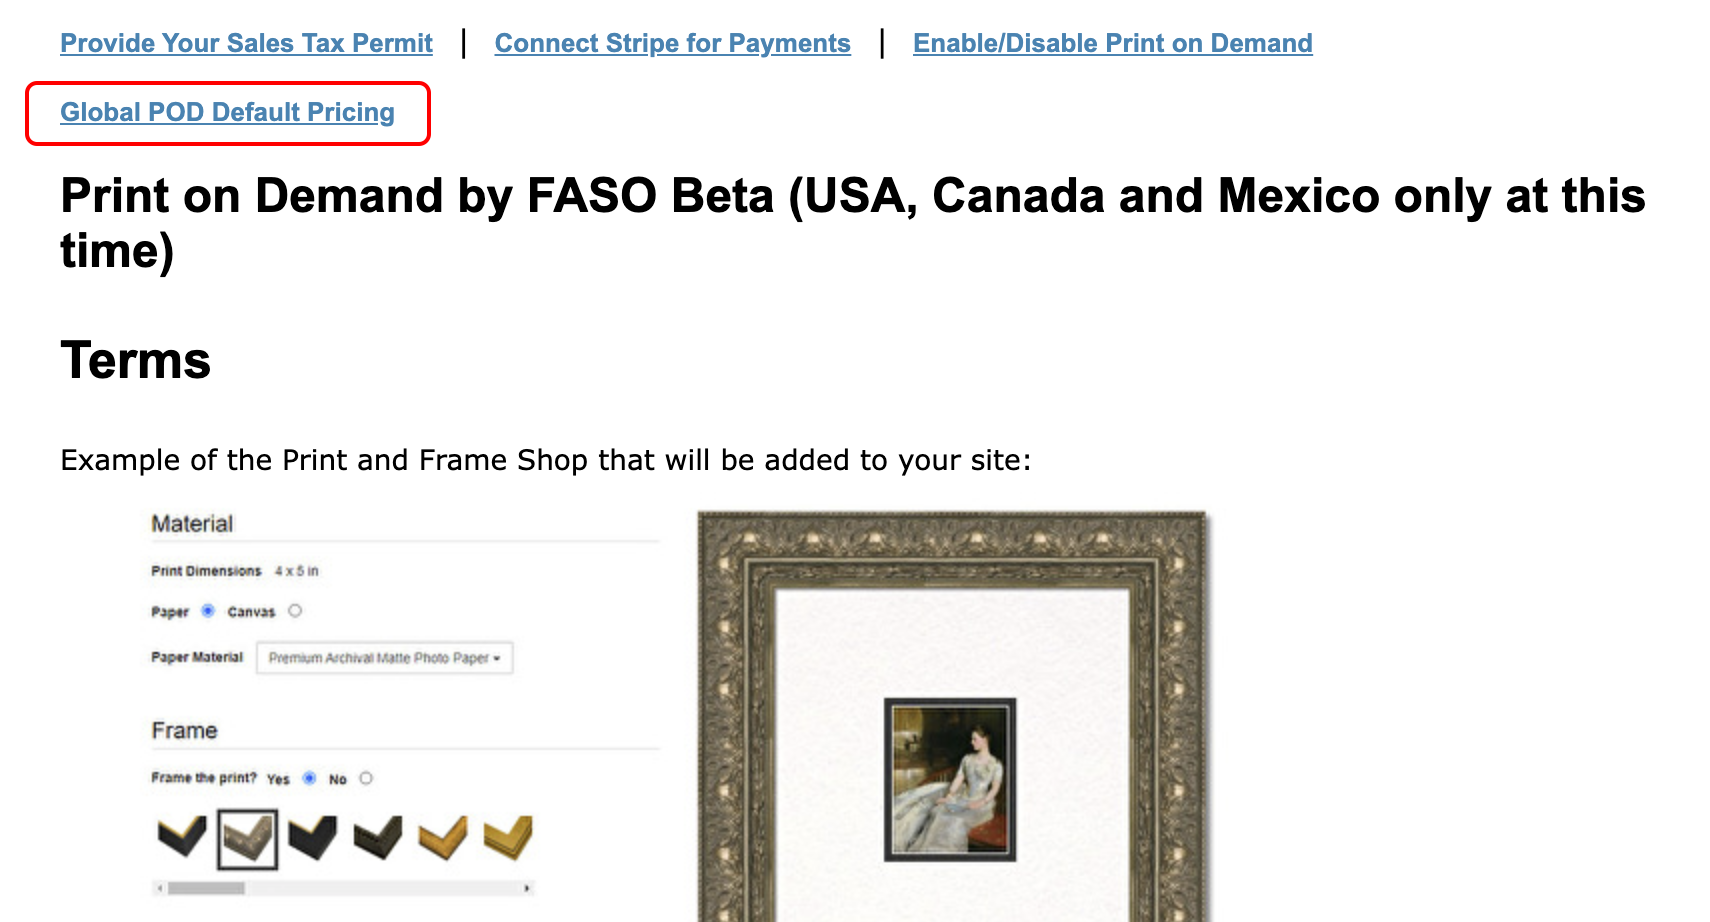
Once this is done, you will see a button on the artwork pages on your site that says View Available Prints. This will link to the print shop where visitors can purchase the prints on paper or canvas along with some matting and framing options.

NOTE: |
See this FAQ if you wish to sell prints and notecards without using the POD service: |
05132025