For all the options available when editing the appearance of an image, see FAQ:
Edit the Appearance of an Uploaded Image.
The following info covers Cropping options in depth.
NOTE: If your end goal is to crop/resize one of your artwork records to have an image you can utilize on social media, utilize this feature: Copy Artwork Image from your Portfolio into Images Folder.
This allows you to make a custom crop/adjustments without altering your original image.
Crop the Image
- from FASO control panel
- click Artwork icon OR Images icon (upper row) depending upon where your image is stored)
- click on thumbnail or Edit link for the image you wish to edit

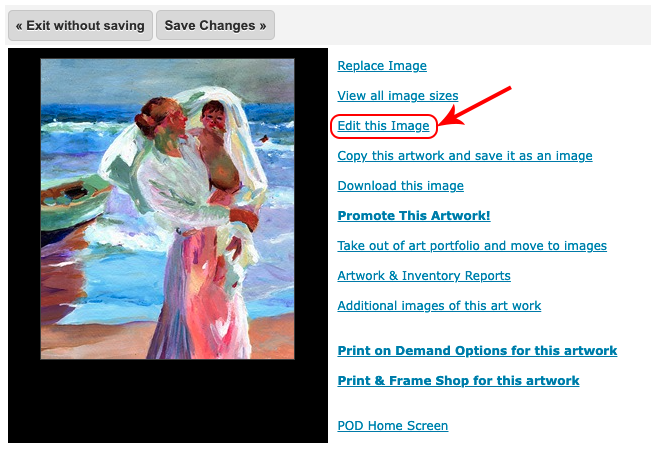
- to the right of the image, click Edit this Image
- Under the Transform tab (below the pixel dimensions) are preset options for
-
Common
provides you with custom crop options, along with the most common image ratio formats -
Instagram
shows preset options for Instagram images based on their use on the Instagram Platform;
profilepicture, square, and story -
Facebook
shows preset options for the image roles on Facebook;
Post, Profile, Title, and Ad
-
Common
- Click on any of the options to see what is offered.
- Collapse the option by clicking the button again or one of the other buttons.
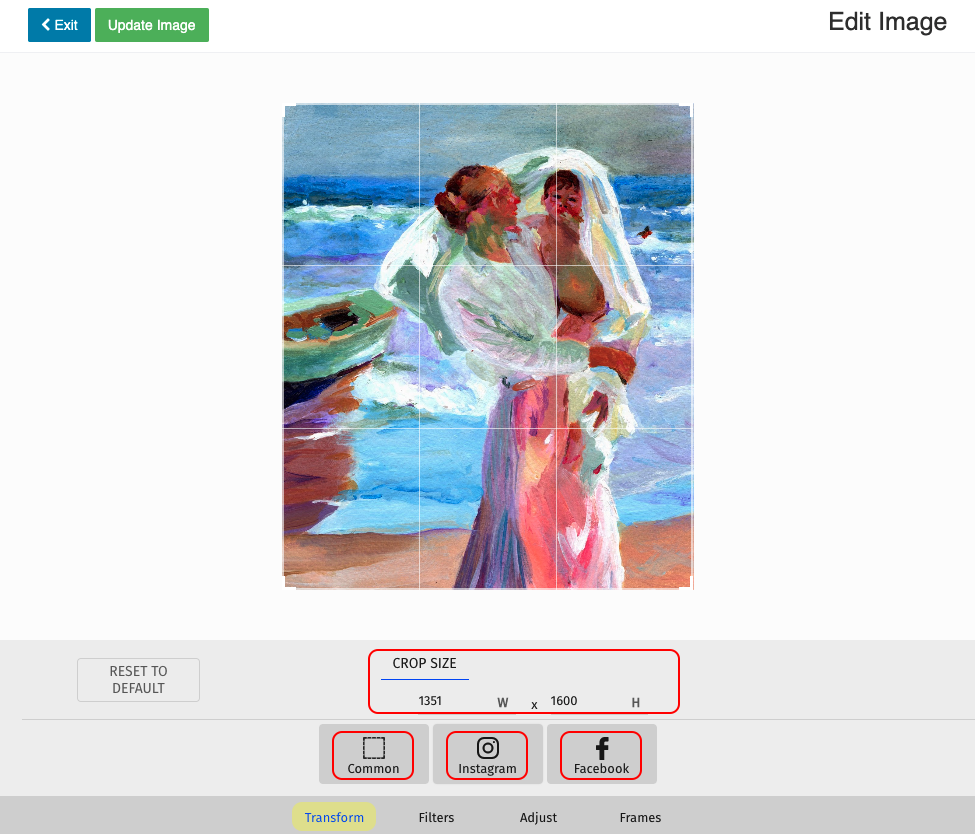
Common button
Click the Common button for selecting and cropping the image based on a specific and common image ratios. Included in the common ratios are square, 4:3 (and 3:4), 16:9 (and 9:16). You also have the ability to make a custom selection as well if you would like to choose a specific portion to crop.

Custom Cropping
- click on Common button
- select Custom
There are two options you can choose from:
-
click and drag from any of the corners to the desired crop
This is essentially a freehand crop. It will allow you to continue dragging or adjusting until you get the grid positioned the way you want it. If you make a misstep, you can always click the Reset to Default button to reset the image and start over. -
specific pixel dimension
if you know the specific pixel dimension you need, enter the desired pixel dimension in the width field, then tab and enter the height pixel dimension in the height field then tab again. Doing this you will see the grid change according to the dimensions you entered. If you click over to the Resolution tab, there is only one option which is to Keep Resolution.
If you click the checkbox, then go back to the crop size options, you can enter the pixel dimension in the width then tab, and the Keep Resolution option will automatically populate the height based on your width entry in order to keep the existing proportion.
- click the Update Image button when you have cropped the image
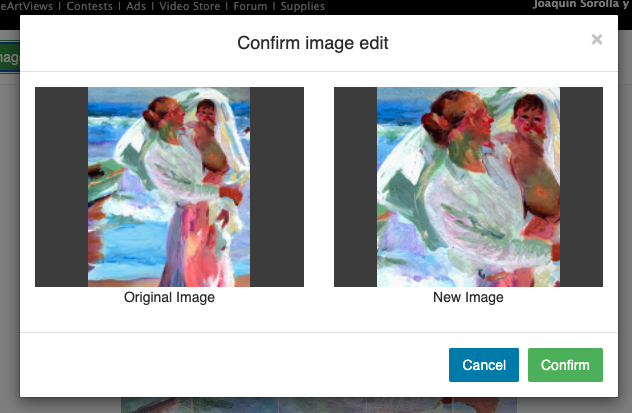
- click Confirm or Cancel
05252022