...from Pinterest help page:
Claim your website
Step 1: Obtain the meta tag from pinterest
- click your picture (top right in Pinterest)
- click pencil (editing) icon, far left

- click Claim

- to the right of Websites, click Claim

- click on Add HTML tag
- click click to copy the meta tag
It will look like something like this:
<meta name="p:domain_verify" content="22f4432135000786rfi129eeb673a64f25" />

NOTE: we are not notified when Pinterest updates their software so we cannot guarantee that the Pinterest steps are always up to date. |
Step 2
Now:
(You may want to open a new tab in your browser)
- Login to FASO Control Panel
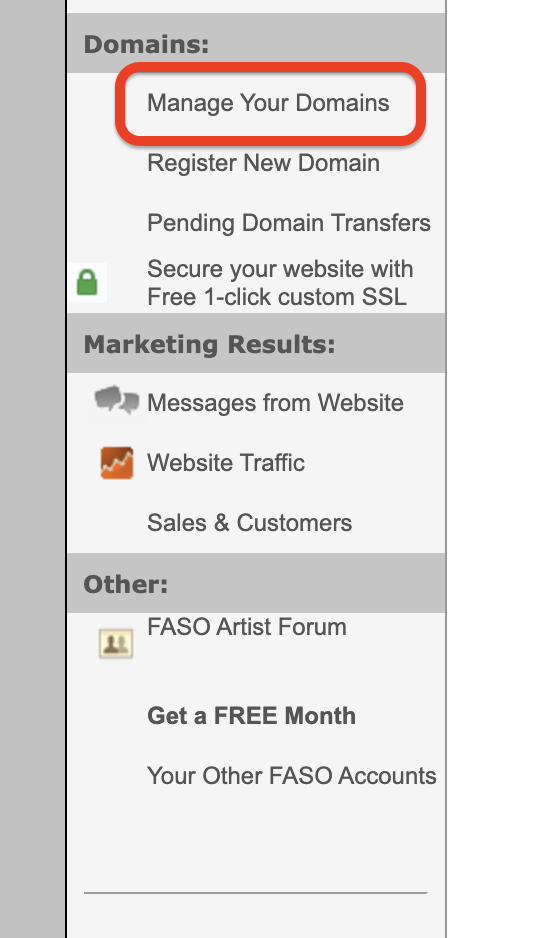
- Click Manage Your Domains (in sidebar on left side of control panel)

- Click on the corresponding domain you want to authenticate.
- Go to the “DNS Records” tab.
- Then, click on “Edit DNS Records”
- A dialog will appear. Enter the value provided you copied from Pinterest, and click “Submit”
- This will submit a request to our domains department. They will work on adding the necessary DNS record to your domain and will follow up with you once it's completed.
Step 3: Add the meta tag to your website
- Log into your FASO Control Panel
- Click on Gear Icon (upper right corner)
- Click on Account Settings
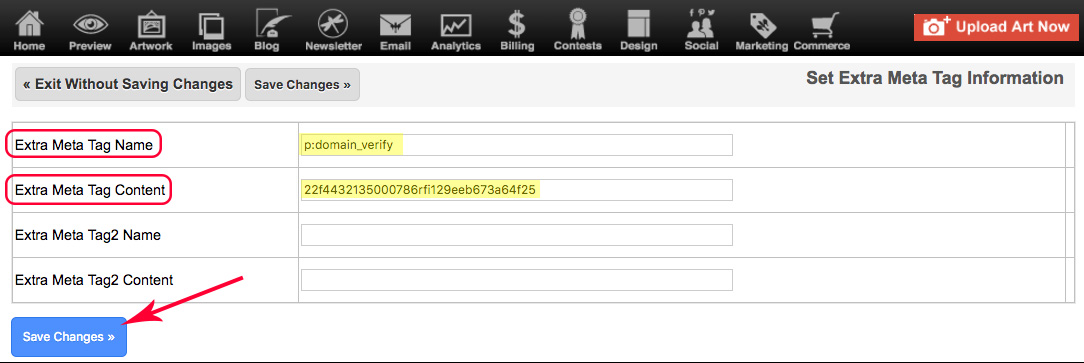
- Click on Set Google Verification/Extra Meta Tags
- for Extra Meta Tag Name field add:
p:domain_verify - for Extra Meta Tag Content field enter the long string of numbers: 22f4432135000786rfi129eeb673a64f25
DO NOT add any Quote Marks |
- Save Changes

Step 3: Finish setting up
- Once you've added the meta tag, give it a minute or two.
- Go back to Pinterest and click Verify
(they’ll automatically check the meta tag and confirm your site)

Use the TXT Record
If Pinterest does not verify using the Google verification option (Set Google Verification/Extra Meta Tags in Account Settings) add it as a TXT record under Advanced Domain Manager.
Here's how:
- from Pinterest, copy the TXT record

- go to FASO control panel
- click on Manage Your Domains (left menu bar)
- click on Advanced Domain DNS Manager (bottom right)
- click Proceed to Advanced Domain DNS Manager →
- click on Edit to the right of the domain name you wish to verify
- click on Edit DNS Zone Records
- for Advanced Records | Add, click Add
- click TXT
- enter your domain in the Key field
- enter the pinterest code
(looks like this: pinterest-site-verification=22f4432135000786rfi129eeb673a64f25)
to the Value field - Submit
Once you've added the meta tag, give it a minute or two.
Go back to Pinterest and click Verify
(they’ll automatically check the meta tag and confirm your site)
11192024