Overview
Your website's navigation bar allows visitors to easily access the different pages/categories on your website, like your Homepage, your Artwork, your About page, your Contact page, etc.
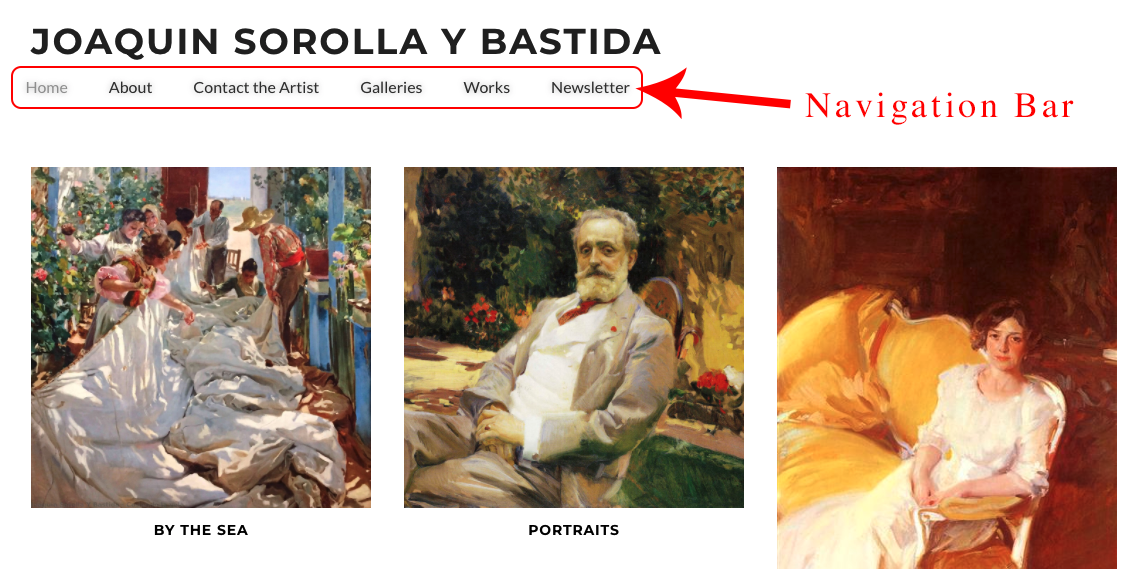
When you begin building your site your navigation bar is automatically set up with these 6 preset template-designed categories:
When you edit your site's navigation bar you can:
- add additional preset template-designed pages, like Events
- add drop down items to a particular category
- delete categories you do not use, like the Galleries category
- change the order of the category listings
- change the name of the category, for example, change "About the Artist" to "About Me" or "About Joaquin." Perhaps change "Works" to "Paintings" or "Art" or even "Sculptures"
- and more!
Click here for info about setting up custom free-form pages that you can use for content that does not apply to any of the preset template-designed pages.
Get Started
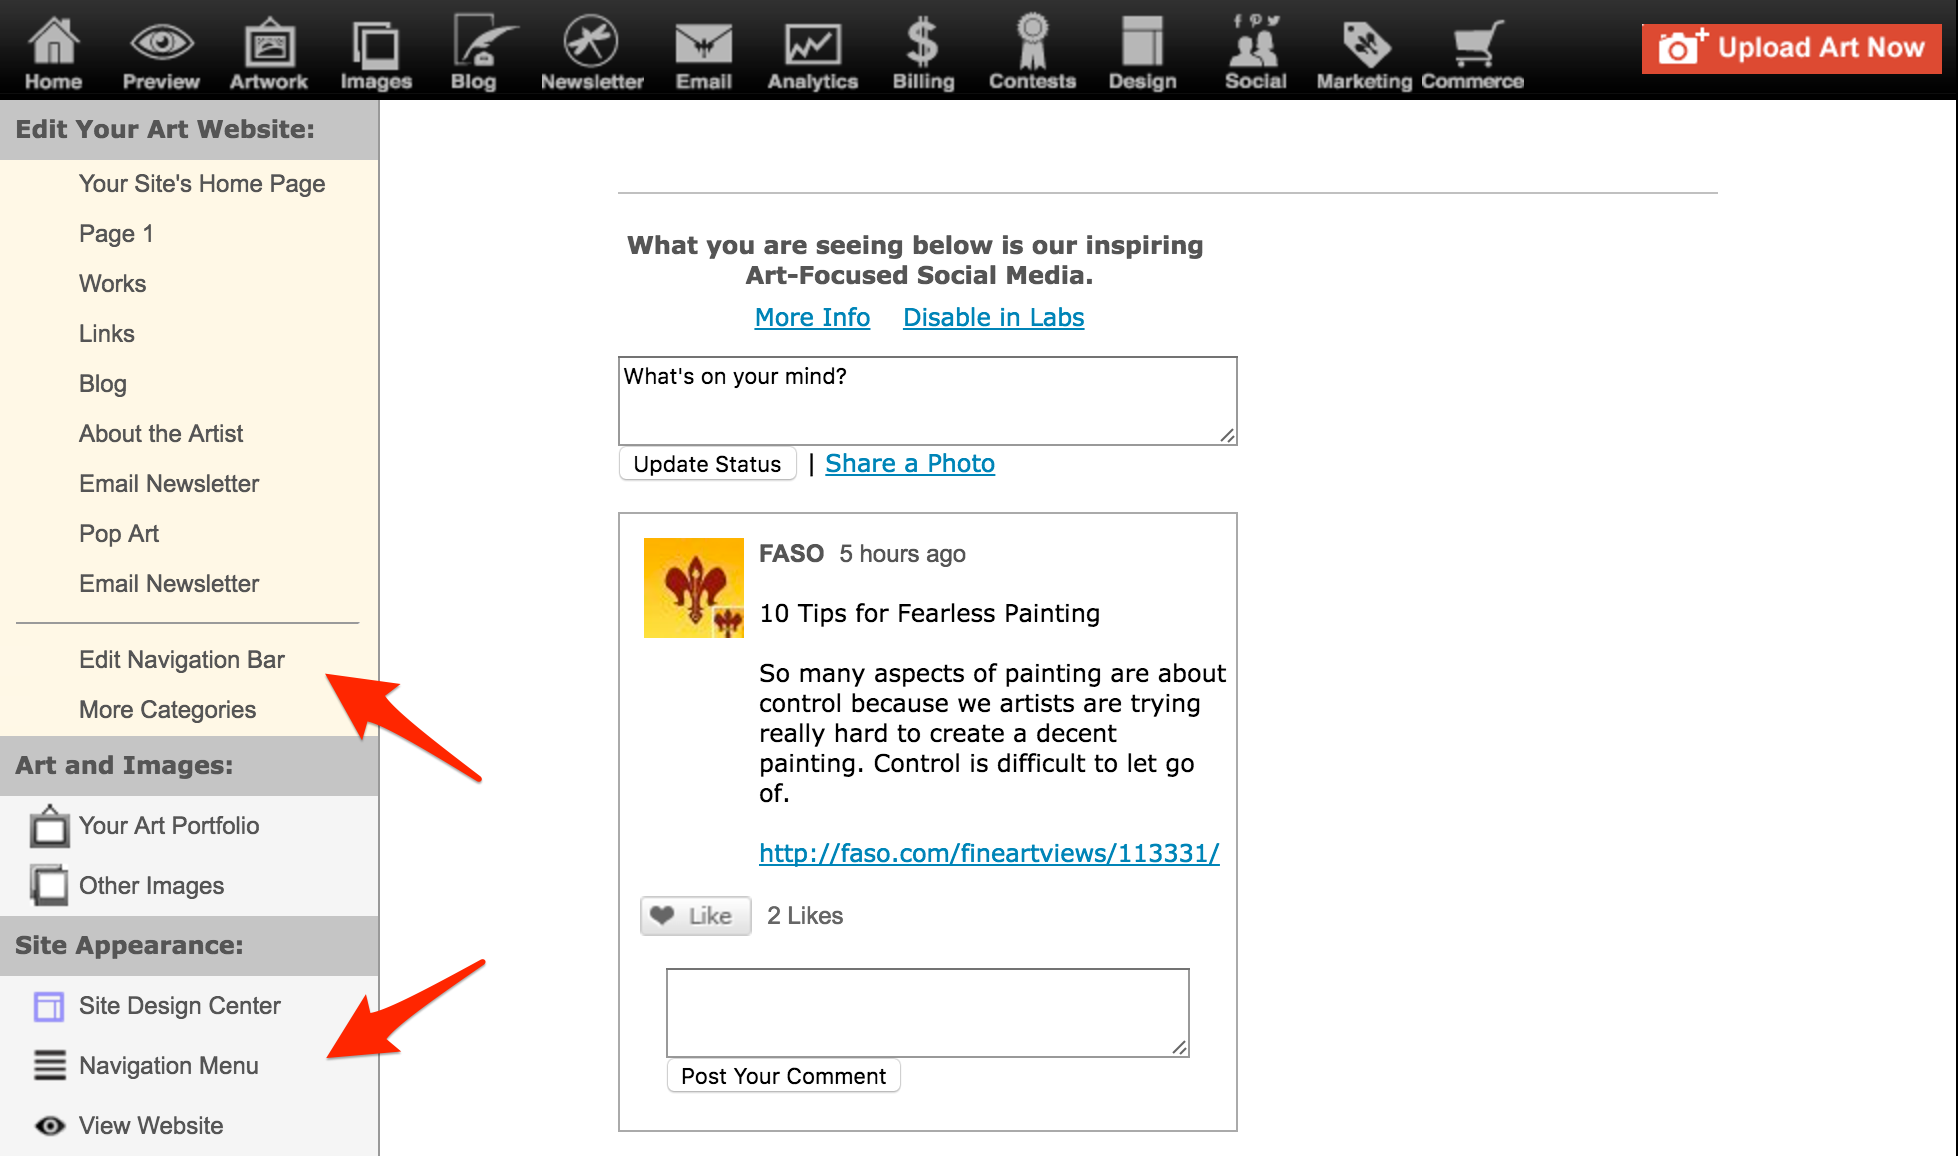
- login to FASO Control Panel.
- Click on Edit Navigation Bar or Navigation Menu link.
(both are in the left-hand maun bar and take you to the same screen)
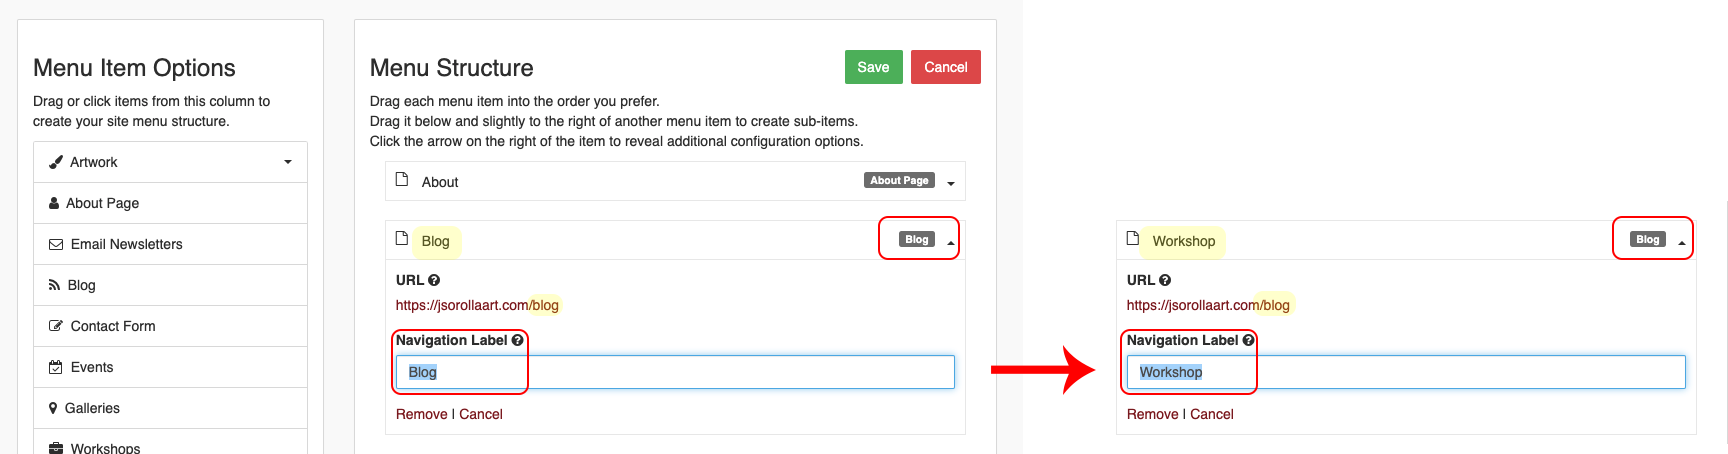
Menu Item Options
The list of items that appear on the left side of the screen help you create links to the different sections on your website.
For example:
- the About Page option creates a link to the About the Artist / bio page of your site
- the Contact Form option creates a link to the Contact the Artist page for your site visitors to get in touch with you
- the Events option will create a link to the page where all your events are listed (shows etc)
- with Custom Link, you can create a link to a specific URL, whether in your site or to an external site
See
Some of the options in the left column have a little dropdown arrow to the right. These contain options related to that menu item type. In order for you to see all the options, click on the dropdown arrow.
For example:
- If you click on the Artwork dropdown arrow, you see an option to add a link to your entire portfolio, or to link to a specific collection of art that you created.
- If you click on the Page dropdown arrow, you have the option to add a link to all your pages, or link to a specific page.
Menu Items
Items on the right side of the screen represent a snapshot of your site's Navigation Menu.
The text that appears on the left side of the navigation item (under Menu Structure) is the Navigation Label. This is what your site visitors will see on your live website - your name for that category.
The text on the right side of the navigation item shows the type of menu/category item that you're using - our name for the category.
Take a look at the following example:
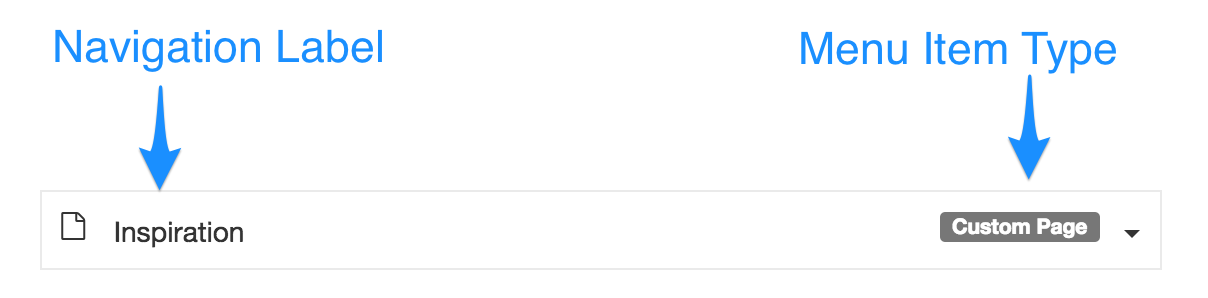
In this example, Inspiration is the label that will show on your site. By looking at it's type, we know it's a link to a custom page you've made.
Add Items to Your Navigation Menu
Once you are in the Navigation Menu editor, you can start adding menu items from the options that are available in the left column. To add one to your menu, simply click on one of them or drag and drop any of of them to the right-hand column.
To drag and drop, click on an item with your left mouse button, then, without releasing the button, drag it to the desired location and release the mouse button to drop it.
FYI:
You can have 12 categories on your Navigation Bar, plus Home.
You can have up to 10 drop-down items under a main category.
Sort Items in Your Navigation Menu
Once you have added items to the right side of the screen, you can sort them by dragging them up and down to the desired position.
To drag and drop, click on an item with your left mouse button, then, without releasing the button, drag it to the desired location and release the mouse button to drop it.
Edit a Navigation Item
Click on any of the menu items (right side of screen) to display the editor.
Depending on the menu item, you will be able to edit the Navigation Label or the URL (web address) of the link.
Remove a Navigation Item
Click on any of the menu items (right side of the screen) to display the editor. Then click on the Remove link, and then confirm if you wish to remove the item from your menu.
IMPORTANT
All of these categories are preset template-designed pages and cannot be interchanged with content that relates to another category:
- About the Artist
- Contact the Artist
- Email Newsletter
- Links
- Pages
- Works
- Articles
- Books
- Blog
- Events
- Galleries
- Workshops
For example, Workshops and Blog, are pre-set template pages. What this means is that any content you add to Blog will display, even if you change the category title/heading to Workshop.
Demo Video
Here is a video that covers all of the instructions mentioned above.
If you can't see the video, try this link: https://ilos.video/cYJHIP