If you are a gallery or an artist membership group that represents multiple artists, we offer a way to set up Collections, one for each individual artist.
NOTE: if you choose to use Collections for multiple artists, you will not be able to use the Collection category for any other purpose. |
Set up a Collection for Each Artist
- from FASO control panel
- create a collection for each Artist
- click Artwork icon (upper row)
- click Add/Edit Collections
- click Create Collection
- for collection name type in the Artist's Name
- Save changes
- repeat for each artist
- Upload Artwork
- Assign each artwork to the appropriate Collection
There are a number of ways to do this:
1. If you upload art for one artist at a time you can select the name of the collection during the upload process, like so (collection needs to already have been set up) :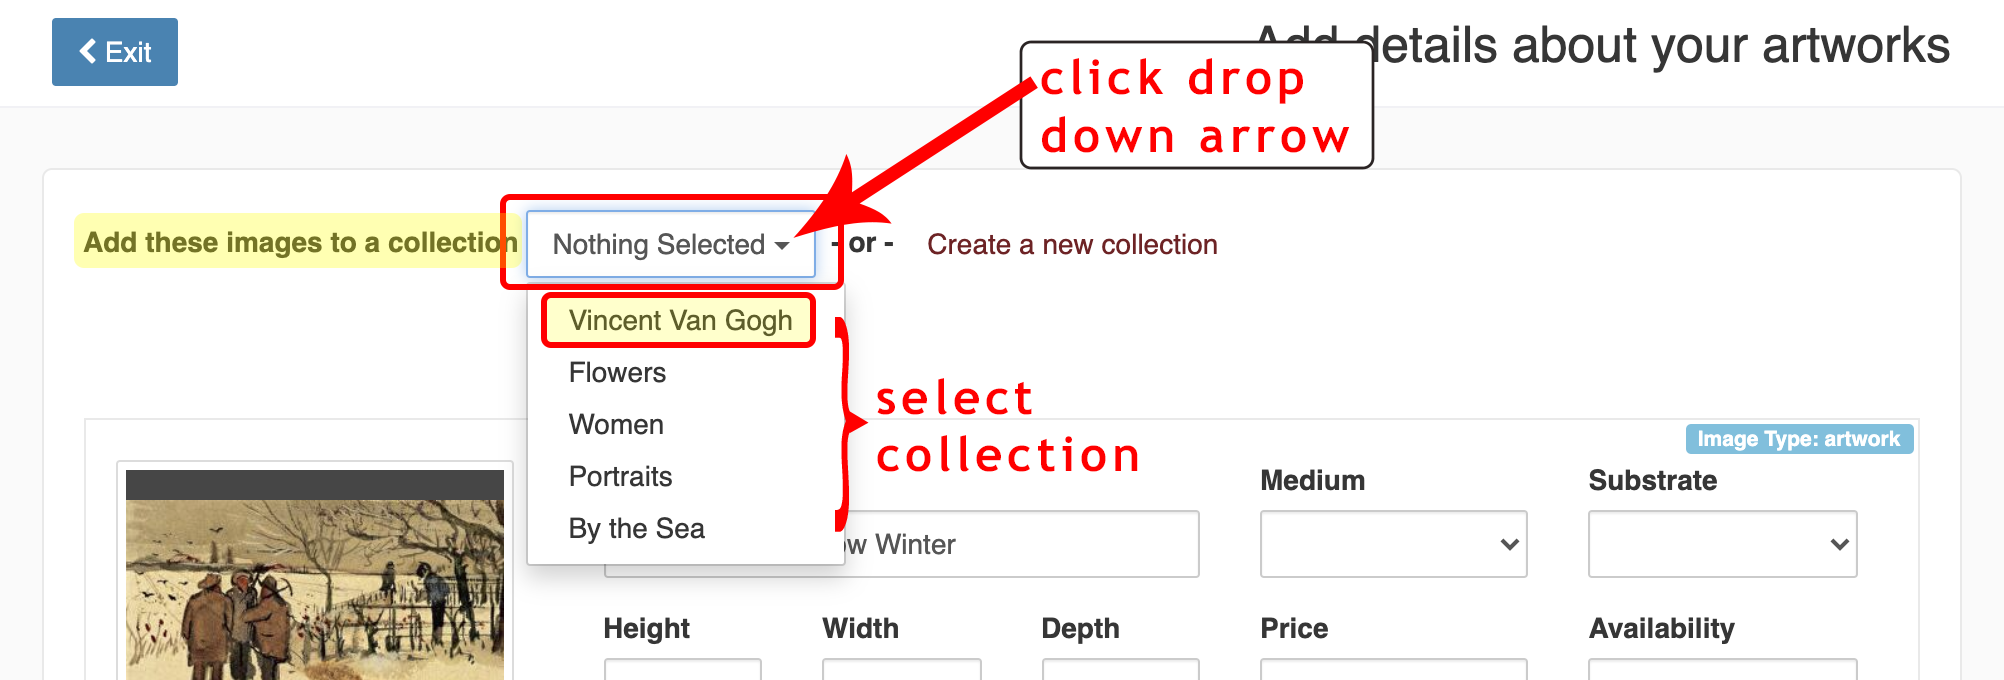
OR
2. From Your Awesome Artwork Portfolio screen, click Edit all Artworks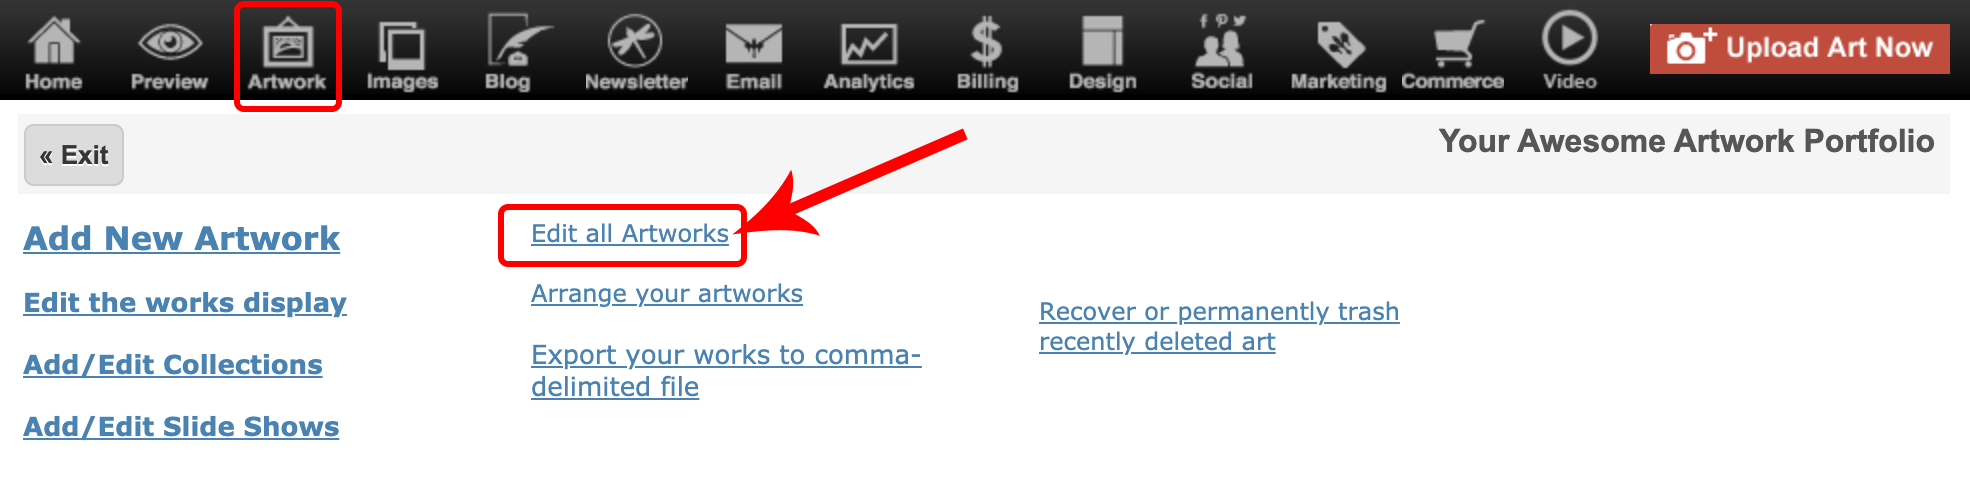 Enter as much info as possible on the editing screen being sure to assign each image to the correct artist's collection
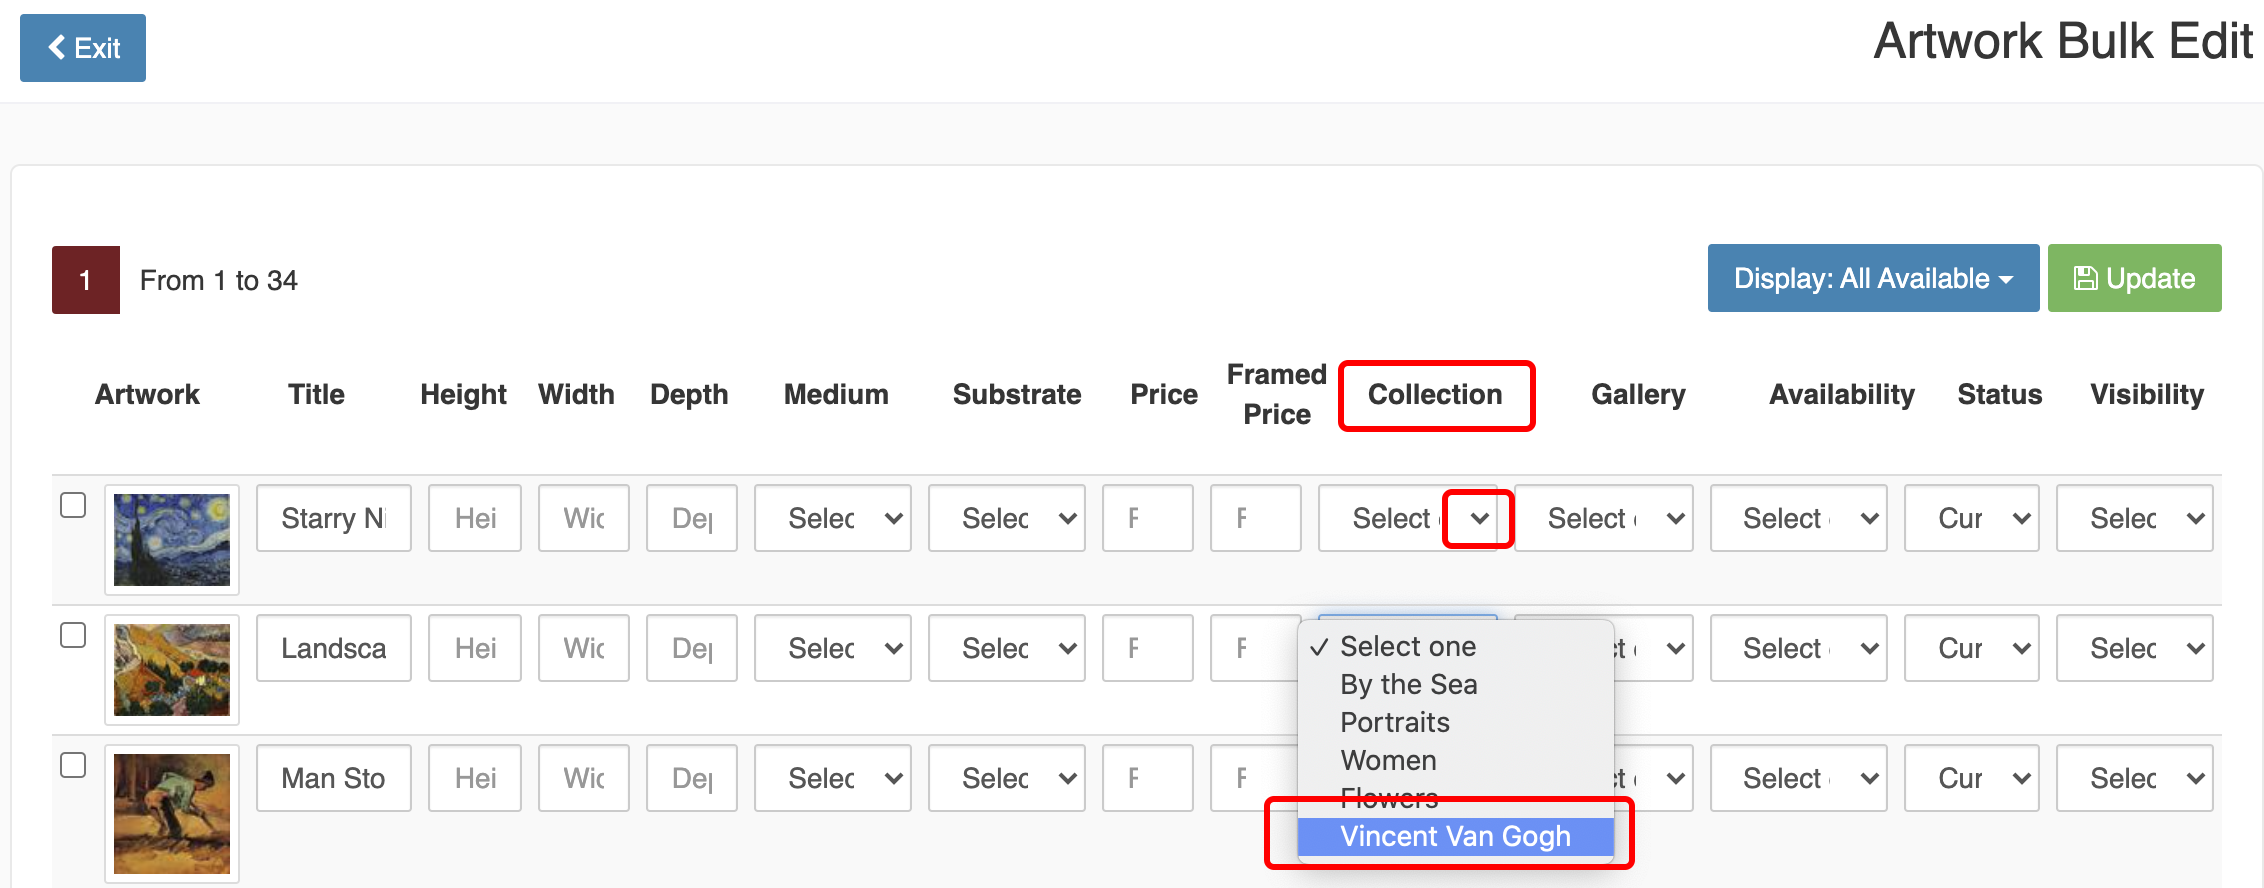
- select an image to represent each collection:
- go back to Artwork Portfolio screen
- click Add/Edit Collections
- click Edit for a Collection
- click Update Cover Image button
- select Image
(this will update automatically)
*** To choose an image to represent each collection that is not in the Artwork Portfolio, perhaps an artist's Bio Photo:
- Make sure the image is uploaded to your Images folder.
See this FAQ: How do I upload and edit non-art images?
Once the image is in the Images folder:
- click Artwork icon (upper row)
- click Add/Edit Collections
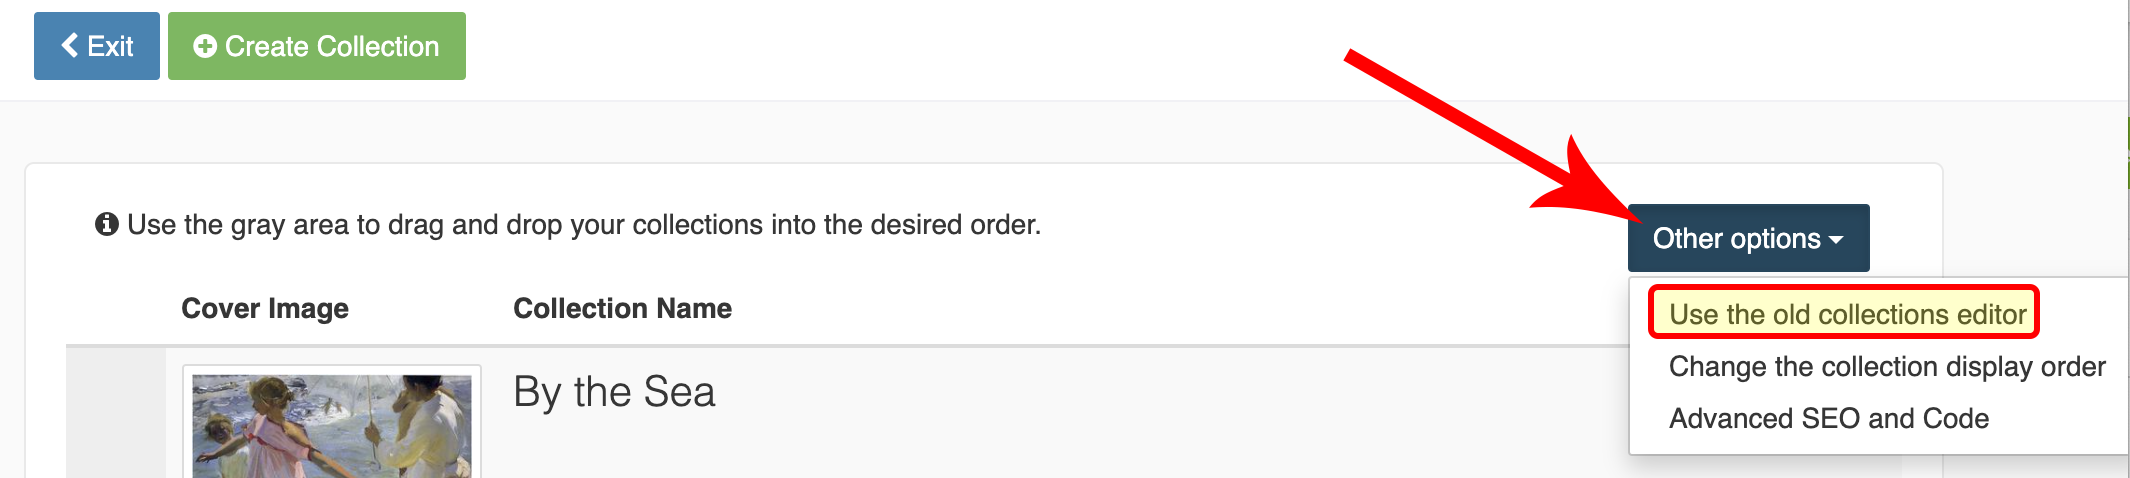
- click Other Options (upper right)
- select Use the old collections editor
- click Edit to the right of a collection
- scroll down to CollectionPicture
- click on Change Image (or click the drop down arrow)
- select your image
- Save Changes
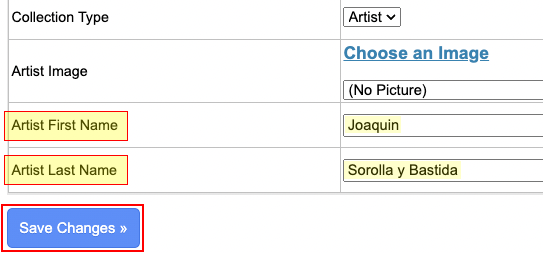
Add Artist Bios
To add a Bio for each artist, you can choose to add a Description to the Collection or add the Bio as follows:
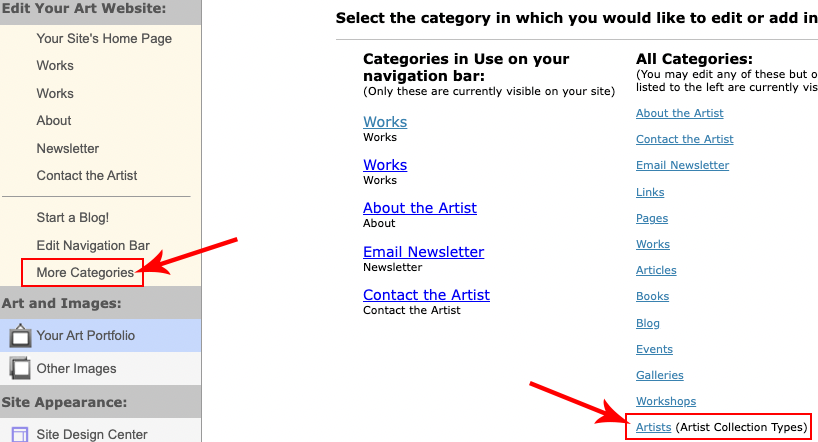
- click on More Categories (left menu bar)
- click on Artists (Artist Collection Types) (right column)

- click Edit for a collection
- enter text into the Artist Bio text field
- for Artist Image, click on Choose an Image
- Save Changes
Add Artist Category to Navigation Bar
- from Home screen of control panel, click on Edit Navigation Bar (left menu bar)
- click on Custom Link in Menu Item Options (left column)
that will pop the Custom Link into the right column - click on the dropdown arrow to the right of the Custom Link
- for url, add /gallery-artists to the domain name that already displays in that field
- for Navigation Label, replace Link with the title you wish to use - such as Artists
- Save

Arrange the Listing of the Artists
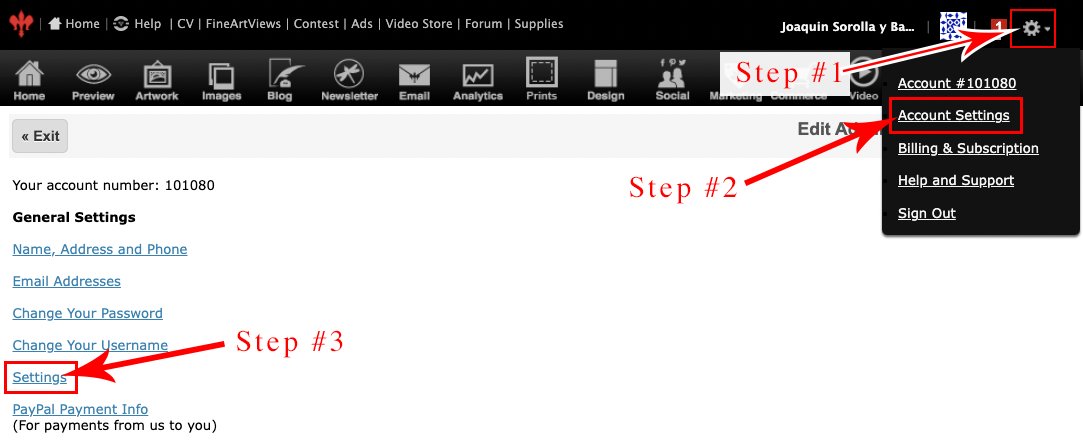
- from control panel
- click gear icon (upper right)
- select Account Settings
- click on Settings
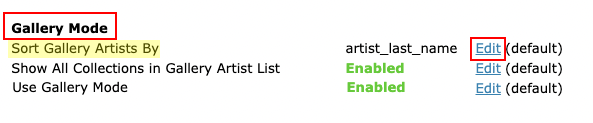
- scroll to Gallery Mode
- select Edit to the right of Sort Gallery Artists By
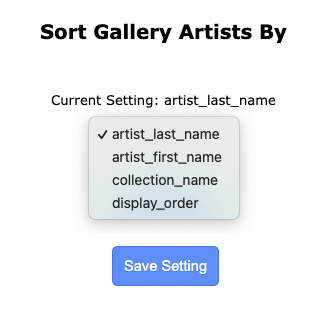
- select your preference:
- artist_last_name (the last name field from the artist edit screen)
- artist_first_name (the first name field from the artist edit screen)
- collection_name (the name of the collection from the collection edit screen)
- display_order (the order of the collections from the collections edit screen)
- click Save Setting
In order to use the artist_last_name option, the first and last name of the artist need to be added here:
- from Home screen of control panel
- click More Categories
- click Artists (Artist Collection Types)
- click Edit to the right of the artist
- add Artist First Name and Artist Last Name
- Save Changes
0728222 - 617322